
Precast Mould Guide
Precast U Drain Manufacturing Process: A Step-by-Step Guide
The precast U drain manufacturing process involves mould preparation, reinforcement checks, concrete placement, curing and inspection. This guide explains each stage and the production details that manufacturers should control when producing concrete drainage channels.
By Paras Steel Industries ·
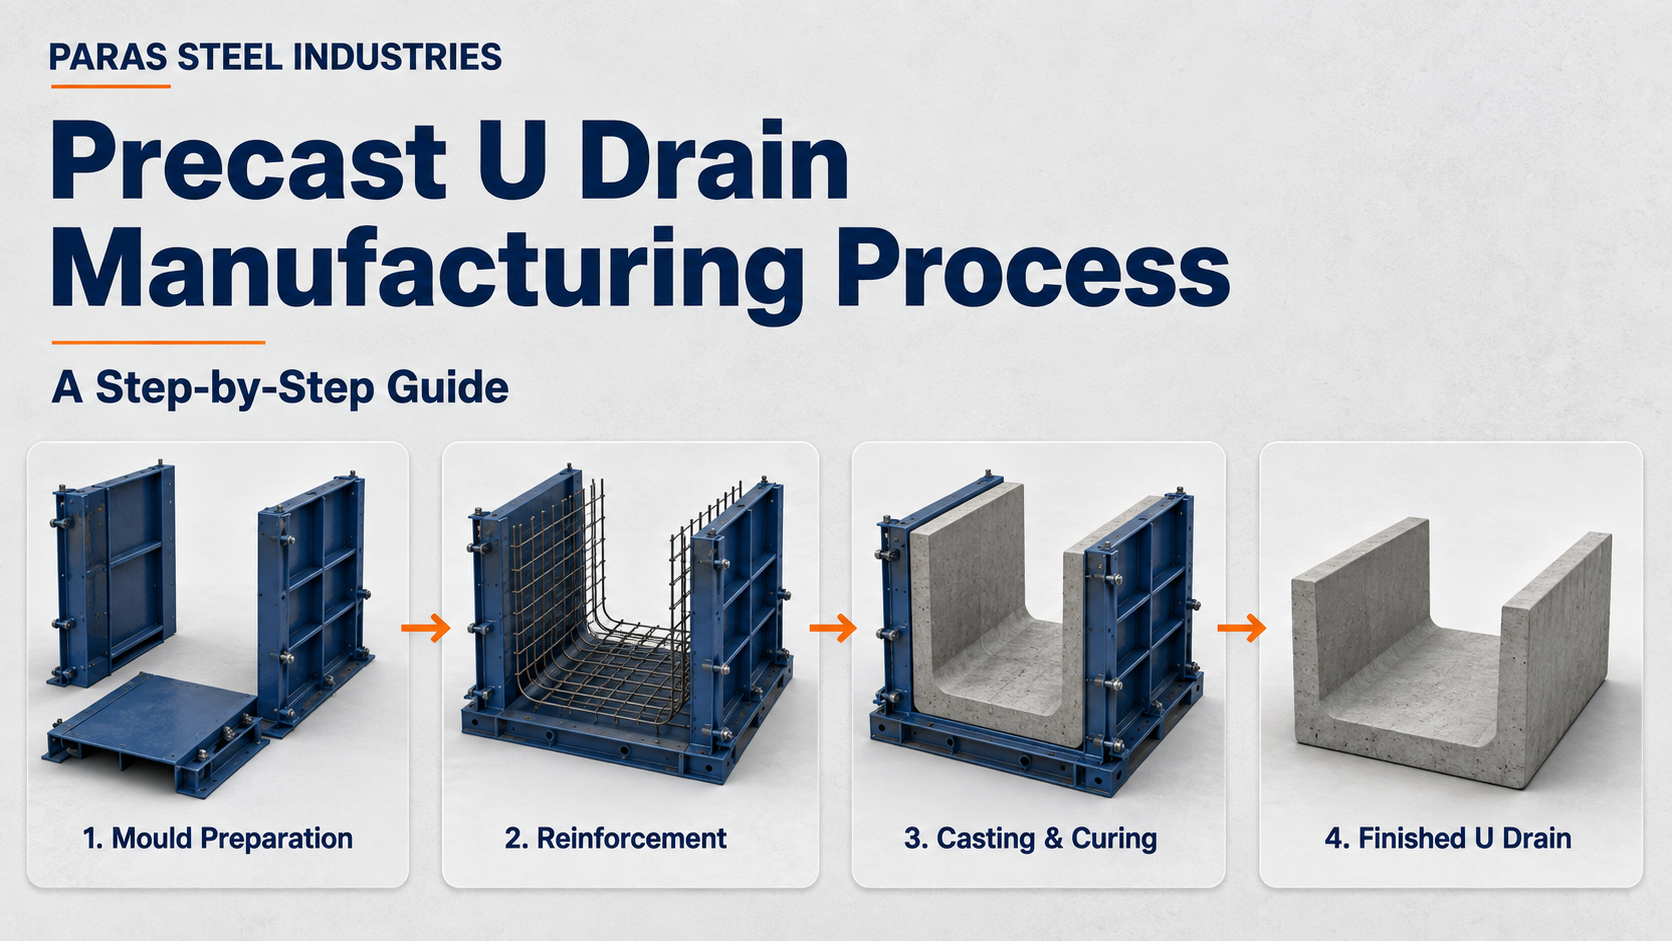
Precast U Drain Manufacturing Process: A Step-by-Step Guide
Inspect the concrete U drain mould before assembly. Remove residue using the approved cleaning method and check the condition of forming surfaces, joints and fastening components. Look for damage or alignment issues that need attention. Confirm that the required parts are present and correspond to the intended drain configuration. A preparation checklist can include: - Forming surfaces inspected. - Concrete residue removed. - Required components identified. - Fasteners and moving parts checked. - Unresolved damage reported. - Correct product configuration confirmed. Follow the supplier’s instructions when cleaning or servicing the equipment. Step 3: Apply the Specified Release Agent Apply a suitable release agent according to its manufacturer’s instructions and the established production procedure. Confirm that it is compatible with the mould surface and any subsequent treatment specified for the concrete. Avoid contaminating reinforcement or other areas where the agent is not intended to be applied. Include application checks in the preparation routine so operators follow a consistent method. Release-agent selection and application should be reviewed if recurring surface problems appear. Step 4: Position Reinforcement and Specified Inserts For RCC U drain production, position the reinforcement cage according to the approved drawing. Check bar arrangement, specified cover and the supports used to maintain position. Verify that reinforcement will remain correctly located during the remaining production steps. Also check any specified inserts, openings or cast-in details. The assembly sequence depends on the mould design. Reinforcement placement may need to be coordinated with the installation of particular form components. Follow the approved method for the equipment being used. Step 5: Complete Assembly and Pre-Casting Checks Complete the mould assembly according to the supplier’s instructions. Check the assembled dimensions and verify that components are correctly positioned and secured. Inspect joints, end forms and any special features. Before concrete placement, confirm: - The correct mould and drawing revision. - Required internal and external dimensions. - Reinforcement position and cover. - Insert and opening locations. - Fastening and assembly checks. - Completion of the required inspection record. Address discrepancies before casting. A pre-casting check provides an opportunity to correct a problem while the assembly remains accessible. Step 6: Prepare and Verify the Concrete Use the approved concrete mix and follow the project’s production and testing requirements. Maintain batch information so the concrete can be traced to the relevant casting. Complete the specified checks before accepting it for placement. Do not substitute a universal mix ratio for the approved specification. Required concrete properties depend on the product design and intended exposure conditions. Any changes to the mix or production method should follow the relevant approval process. Step 7: Place and Compact the Concrete Place concrete using the established procedure for the component and equipment. Coordinate placement and compaction so reinforcement and cast-in items remain in their required positions. Monitor the assembly during casting for any issue that requires work to stop. Use the specified compaction method. There is no single vibration duration suitable for every mix, section and equipment arrangement. Record relevant production observations. These records can help identify whether a later defect is associated with preparation, placement, compaction or another stage. Step 8: Finish Exposed Surfaces and Begin Curing Complete the specified finishing of exposed surfaces, including any areas that must meet adjoining components or covers. Begin the approved curing procedure and maintain the required conditions. Record relevant times and other checks required by the quality plan. Curing should be treated as a controlled production stage. The appearance of the surface alone does not establish whether the concrete is ready for demoulding. Step 9: Verify Readiness for Demoulding Confirm that the casting has met the specified release-strength criteria before opening the mould. Do not assume that the same waiting period is suitable for every batch or production condition. The concrete mix, curing method and component design all affect the release decision. Use the required verification method and record the authorisation to proceed. Step 10: Open the Mould and Handle the Drain Follow the equipment’s approved opening sequence. Remove or move form components as instructed, then handle the finished drain using its approved lifting arrangement. Coordinate the operation with the personnel and equipment assigned to the task. Avoid improvised lifting or forcing the product free when release does not proceed as expected. Investigate the cause according to the operating procedure. Place the drain on the specified supports and continue any required curing or protection. Step 11: Inspect the Finished Precast U Drain Inspect the casting against the approved drawing and acceptance requirements. Checks may include: - Internal and external dimensions. - Finished unit length. - Joint and cover-support details. - Position of openings and inserts. - Surface condition. - Edges and visible damage. - Required identification markings. Record defects and handle them through the approved assessment procedure. Repairs, where permitted, should follow an accepted method rather than being carried out informally. Keep accepted and nonconforming products clearly identified. Step 12: Store, Identify and Prepare for Dispatch Store the finished drains using the approved support and handling arrangement. Maintain identification linking each unit or production batch to the relevant casting and inspection records. Before dispatch, confirm that the product has met the required acceptance and delivery criteria. Check quantities, identification and any specified documents. Packaging, loading and transport arrangements should suit the finished component and the delivery plan. Production Records Worth Maintaining A useful production record connects the material, equipment and finished product. Include the information required by your quality plan, such as: - Casting date and product identification. - Drawing revision. - Mould identification. - Concrete batch reference. - Pre-casting inspection. - Curing records. - Release-strength verification. - Final inspection and acceptance. - Recorded defects and corrective actions. These records help the team investigate recurring issues and review production performance. Common Process Mistakes to Avoid Common sources of avoidable problems include casting from an outdated drawing, skipping assembly checks and using unverified demoulding times. Other issues can arise when reinforcement moves, special features are omitted or production records are incomplete. A clear checklist should identify what must be checked, who is responsible and when approval is required. Update the procedure when an investigation identifies a useful corrective action. Frequently Asked Questions What equipment is needed for precast U drain manufacturing? The setup generally needs suitable moulds and equipment for concrete production or supply, placement, compaction, curing and handling. The exact arrangement depends on the approved manufacturing method. Is reinforcement required in every U drain? Follow the product’s approved structural design. Reinforcement requirements should not be assumed from the channel’s appearance or size alone. How long should concrete remain in the mould? Demoulding depends on the specified release-strength criteria and verification method. A fixed number of hours should not be applied to every production condition. Can one U drain mould produce multiple sizes? Only where the equipment supports the required configurations. Confirm the supported sizes, components and setup instructions with the supplier. Does a good mould guarantee the quality of the finished drain? No. Concrete properties, reinforcement placement, compaction, curing, handling and inspection also influence the finished result. Discuss Your Precast U Drain Mould Requirement Contact Paras Steel Industries with your approved drain drawing, required mould quantity, production details and delivery location. Sharing your manufacturing sequence and handling arrangements provides a clear starting point for discussing the U drain mould specification.